Pinching Pennies by Meal Planning

pinching pennies

Dear Pregnant Self,

So, your now a Meal Planning pro! Excellent! But, did you know that you can use Meal Planning to help pinch pennies?  Here are a few tips that help us stick to our budget at the grocery store:

1. Use big ticket items, like meat, multiple times during the weekly menu to help illuminate waste (and save time). For example; roast a whole chicken on Saturday and then use the leftovers on Tuesday for shredded chicken tacos or salad!  Take it even further and use the bones to make stock for soup on Thursday, three meals with one chicken.

salad1

2. Shop seasonally.  Most produce items will be on sale, or at lower cost, when they are in season.  Added bonus, they will also TASTE better in season too.

spinach1

3. Don’t get suckered into convenience items like pre-chopped and washed vegetables.  Buy whole produce and wash, peel and chop yourself.  Not only will you save money, but you will also retain more vitamins and nutrients this way.  You will also get a longer shelf life.

veg2

4. Try not to waste money on unneeded beverages.  In our local grocery store there are 3 entire aisles dedicated just to sugary beverages.  Of course you will need milk and maybe coffee and OJ but sodas, juice cocktails and sports drinks are not only very bad for you but total budget suckers!  Water is a much healthier and much cheaper beverage option.  You can even cut out bottled water by investing in eco-friendly reusable bottles, such as Klean Kanteens and installing a simple home tap water filter.

food2

5. Go meatless one or more days a week.  Meat is not cheap and there are so many other creative ways to get protein in your meals.  Try a bean dish or experiment with tofu type substitutes.

6. Buy in bulk or BOGO sales. In our house, if it goes in the freezer it may never some out, so if we get a super great bulk buy deal then we try to use it that week.  There are thousands of ways you can use chicken breasts, be creative.  But, if you do need to freeze it, put a post it on the fridge to remind you its in there, nothing worse then throwing out tons of $$ in freezer burnt meat.

7. Freezer burritos and wraps.  This is a great way to use up leftovers! Always try to have a package or two of your favorite wrap on hand (they freeze very well).  For example: leftovers from taco night, turn into mexican burritos or sausage and peppers into great freezer friendly wraps.  If you have it left over and it freezes, wrap it up! The hubby loves to bring these to work for lunches and late night snacks.

After implementing these budget busting tips, how are you going to spend all that extra coin?

Blessings and Love,

Colleen

How to Start Meal Planning


mealplanning logo

Dear Pregnant Self,

Finally, your little love is pretty much enjoying all the same foods you are! Now its time to get organized. Starting with Meal Planning. Honestly, it really isn’t very hard, just takes a little time and practice. Some benefits of taking the time to Meal Plan; saves money, less stress, fewer trips to the store, creates opportunity for healthier eating, eliminates the great family dinner debate, and is an easy place to start organizing your entire life.  Step by step, here is how we tackle this:

1. Create a Shopping List-
To get set up, first make a list of everything the family normally purchases at the grocery store, add to that other things you might cook with now and then.  Next, set up your list according to the aisles in the store and group the items accordingly.  Make sure to leave some blank spaces in each section to add items that may not be on your original list. Your best bet is to type this up and print out copies to use each week. Here is a sample: Shopping List

thanks2

2. Create a Weekly Menu-
Use a simple spread sheet or get creative! Here is a basic sample you can type up and print out: Weekly Menu. You can also use a chalk board, magnetic board, your refrigerator, or any of the thousands of ideas floating around Pinterest.

3. Choose a Day to Plan and a Day to Shop-
For us, it works best to plan leisurely on Friday when we get a few seconds then do the actual shopping on Saturday mornings.  You can also plan and shop on the same day, whatever works best with your schedule. Also, you may choose to plan for the entire month all in one day then just shop each week accordingly.

sandwich1

4. Read your Local Sale Flyers-
When you are ready to sit down and plan, grab your local stores sale flyer(s). Take a look at their major sales and any other items you may need to purchase that week.  We try to coordinate whats on sale with what your menu looks like. For example, if ground turkey meat is on sale we might make chili, meatballs or minestrone soup.  After consulting the flyer and taking into account the weather, family activities, whats growing in your garden, special events, whats fresh this time of year and holidays, it is time to make the menu.

food1

5. Making your Weekly Menu-
Making your menu might seem daunting but its only 7 days, right? You can do it! For our family we use pretty much the same formula each week, with a few variations here and there: a soup, a pasta dish, breakfast for dinner, take-out, a major protein, vegetarian and something new.  We did not intend to do this, it is just how the process evolved and it works for us. We really just plug in the recipes for each items and give it a day and its done. Easy.

cart1

6. Check off your Shopping List:
Now, go through all of your recipes and highlight all the ingredients you need to purchase on your shopping list. Then check your pantry and refrigerator for every day items you need to replenish and mark those off as well. For example; we know every week that we need to purchase milk, eggs and bread, it is not on the weekly menu but we know our family needs it. You may also wish to go online and print any coupons for items your purchasing to save some extra cash.

7. Do your Shopping and Stick to the Menu:
All that is left is shop and cook.  Make sure to stick to your menu during the week because then all your hard work is for naught.

jw1

Hope this helps inspire you and your family to start meal planning!

Next post we will share some tips and tricks to help save money while Meal Planning.

Blessings and Love,

Colleen

Recipe: Unlimited Possabilites Chocolate Smoothie

Dear Pregnant Self,

I used to LOVE breakfast and was sure to make time for myself to sit down and enjoy that morning meal. Now, however, lil man usually has other ideas and sometimes it is 2pm and I realize I haven’t eaten all day!  Breakfast sets up your entire day and gives you the energy you need to make it to bedtime.  I need to remind myself sometimes that in order to be the best mom I can be for JW, I need to keep myself healthy, and breakfast is a good place to start.  Smoothies are a great meal option for busy moms (or anyone else, even kids!) that need to go go go.  I recently came across an almond butter and coca smoothie recipe and decided to tweak it and opened up so many other flavor combinations in the process.

smoothy1 smoothy2

Unlimited Possibilities Chocolate Smoothie

1 medium sized frozen banana
1/2 cup of chopped spinach or a handful of baby spinach leaves
1/2 – 1 cup milk of choice (almond, soy, rice, organic, chocolate, whatever you like)
2 T nut butter (peanut, sunflower, almond, cashew, whatever you like)
1 heaping T unsweetened coca powder
1 T  old fashioned oats (or chia seeds, pumpkin seeds, dried coconut, whatever you like)
3-4 ice cubes if you would like it very thick and very cold

Blend and drink immediately.
You could also pour into ice cube trays and freeze for later use; when your ready just pop a handful of cubes into a blender and enjoy.

Do you see how the possibilities are endless? There are so many combinations! How about using kale instead of spinach? ANOTHER OPTION! And it gives you a serving of fruit and veg in one drink. LOVE LOVE LOVE this smoothie!

Hope you enjoy it as much as we do. Another JW approved recipe too!

Blessings and Love,

Colleen

Original recipe source : http://mywholefoodlife.com/2013/09/18/almond-butter-chocolate-smoothie/

Recipe: Quick and Easy White Bean Chicken Chili

Dear Pregnant Self,

This is another new recipe post for us.  Since the last recipe post was SUPER popular, I decided to continue the trend and share some of our favorites.  Yesterday, we made a delicious roast chicken and had a ton of leftovers.  A great way to use leftover cooked chicken is White Bean Chicken Chili.  This recipe is quick, easy and super yummy.

photo (12)imageimage (1)image (2)image (4)image (3)image (5)image (6)image (7)photo (13)photo (14)

Quick and Easy White Bean Chicken Chili

Chili:
2 cups of cooked and shredded chicken
4 tablespoons butter
1 large diced onion
3-4 cloves of chopped garlic
4 tablespoons flour
(seasoning measurements are estimated)
1 tablespoon Kosher salt
1/2 tablespoon black pepper
1 teaspoon garlic powder
1 teaspoon onion powder
1/2 teaspoon paprika
1/2 teaspoon chili powder
1/4 teaspoon cumin
1/4 teaspoon cayenne pepper
2 cans of great northern white beans, drained and rinsed
1 small can of diced green chilies
32-64 oz of chicken broth

Toppings:
sour cream
cilantro
shredded cheese
yellow corn chips

1. Melt butter in a large pot or dutch oven
2. Add onion and garlic, sweat until translucent
3. Add spices, stir
4. Add flour and cook, stirring constantly for about 1 minute
5. Slowly add first 32oz of chicken broth while stirring
6. Add chilies, beans and chicken
7. Simmer for at least 1 hour, add broth as chili cooks to achieve desired consistency
8. To thicken chili, use a potato masher to mash beans and break up chicken until thick
9. Serve with your favorite toppings

* This can easily be a crockpot meal, do steps 1-4 on the stove then transfer to the crockpot for the rest of the recipe
* Also, you can use 1 taco seasoning packet as a substitute for all of the spices

Hope you enjoy as much as we do! Eventhough this is a bit spicy, JW still loves it, so do not be afraid to share with your kids, they might surprise you 🙂

Blessings and Love,

Colleen

Recipe: Unstuffed Summer Squash

Dear Pregnant Self,

This is a new type of post for us.  Now that little man is a “toddler,” EEEK, he eats a lot of the same foods we do.  I thought it would be appropriate to start including recipes we all enjoy.  One of our favorite meals is a rice and ground turkey stuffed summer squash.   However, the original recipe calls for you to steam each squash half individually and scoop out the seeds and stuff each boat before baking.  You can see how this would be extremely time consuming, and with a 13 month old, time is something we do not have very much of.  To streamline this dish, I decided to cut the squash up into small bites and mix it into the filling, layer it in a baking dish and top with the cheese sauce, then bake. SIMPLE! and it only uses 2 dishes, bonus!

photo (8) photo (9)

photo (10) photo (11)

Turkey and Rice UnStuffed Summer Squash

Filling:
2 lbs lean ground turkey
1 cup of instant rice (brown or white)
2 cups water
28 oz of stewed tomatoes
salt and pepper to taste

Squash:
3 summer squash

White Sauce:
2 cups cold milk
4 tablespoons butter
4 tablespoons Wondra flour
1 cup parmesan cheese

1. Brown turkey in a large pan, add rice, water, tomato, salt and pepper
2. Simmer for 30 minutes, until almost all water is absorbed
3. Cut squash into bite size pieces and add to the filling, cook for another 5-7 minutes until soft
4. Make white sauce, add milk, butter and Wondra to a sauce pan over medium high heat and whisk until thick, add cheese *
5. Spread filling in a large baking dish and top with white sauce, cover with foil
6. Bake on 375 degrees for 30-45 minutes until hot and bubbly, you can remove foil to let cheese brown if desired
7. Let sit for 15 minutes before serving to allow the juices to thicken and firm

*Feel free to use whatever white or cheese sauce recipe you have if you do not like to use Wondra, have enough for 2 cups

Hope you enjoy as much as we do!  JW gives it 2 thumbs up!

Blessings and Love,

Colleen

Tried and True Baby Shower Gifts from Mom to Mom

shower

Dear Pregnant Self,

Baby Showers are such a wonderful event for both the mommy-to-be and her loved ones.  SO here is how it works; the mommy-to-be is “showered” with gifts, words of wisdom, love and laughter and everyone gets to eat.. a lot!  Who wouldn’t love that?  However, it can be a little stressful for the mommy-to-be leading up to the day because she and daddy-to-be need to register for baby gear.  So, it is only right that the invitees actually purchase gifts OFF THE REGISTRY!  Yes, thats right, I went there.  Mommy-to-be has spent so much time researching and investigating products, choosing the exact item for their beautiful baby, so do the right thing and gift off the registry.  BUT!  That doesn’t mean you cannot give a registry gift AND a more personal, sentimental or homemade gift.  Those types of gifts are loved and cherished for years, by both mommy and baby.

shower2

That being said, here are my recommendation for some tried and true baby shower gifts:

1. Chew Beads!  It took us 9 months to discover these and I wont let any other mommy have to wait that long.  I give these before the baby even gets here at the baby shower, so mom is ready.  They are jewelry for mom and a teething dream for baby. Even at a year old, these are JWs favorite.  They are a small investment at $36, but they will last I promise!

Chewbeads

Chewbeads

2. Pacifier Clips!  If you allow it and if your baby will take it, pacifiers can be a blessing, but they seem to be always falling on the ground.  To remedy this, make sure you have plenty of passey clips.  The best are the metal clips, they hold the tightest. They also are pretty cheap, making it easy to stock up.

Pacifier Clip

Pacifier Clip

3. Palmolive Baby Bottle Wash.  The hospital will show you how to use a basin and baby wash to clean bottles and pump parts.  However, the baby wash just doesn’t get the milk residue out of the plastic and you get major odors.  Normal dishwashing soap is too harsh for baby items and honestly doesn’t work as well at the baby bottle wash from Palmolive.  Can be a little pricey, so make sure to use coupons or check online sales and have it delivered.

Baby Bottle Wash

Baby Bottle Wash

4. Cloth Diapers are the perfect spit up rag.  Try to get the pre-folded kind that are thick in the center, they work best.  Seriously, I would have a minimum of 2 dozen of these on hand, they are THAT good.

Cloth Diapers

Cloth Diapers

5. White Noise Machine.  SLEEP SAVER!  No one likes to tip toe around the house while the baby naps or sleeps.  This will block all that noise and also allow baby a peaceful rest.

White Noise Machine

White Noise Machine

I am sure this list will get updated as time goes on, but for now these are 5 great ideas for a personal touch on your baby shower gift.

Blessings and Love,

Colleen

Surviving Sleep Your Babies First Year, pt 2

Dear Pregnant Self,

Every family chooses to handle their babies sleep in a different way.  There is really no right or wrong way, as long your little love is getting enough sleep to allow them to grow, develop and rest properly, that is all that matters.  Co-sleeping worked for us for 9 months, then it became dangerous and none of us were getting the proper amount of sleep.  We needed to teach JW how to fall asleep on his own, in his own crib and put himself back to sleep when he awoke during the night.  Easier said then done.  After a few failed attempts, we reached out to a Sleep Consultant.  We chose to work with Alison from Sleepytime Coach. (I need to stress again that this is just the strategy that we used for JW, all children are different and I highly recommend you work with a consultant to taylor a routine of your own.)

The first step was to meet with Alison so she could get to know JW, us and our individual situation.  Two and a half hours later we had a plan!  I had to purchase a few things before the training began; blackout curtains for JWs windows, a medical grade white noise machine and a lovey (which we already had).

Blackout Curtains

Blackout Curtains

Lovey

A Lovey

After purchasing our arsenal, it was time to make a nap time and nighttime routine.  To set your babies night up for success, you first need to prepare him during the day and evening.  That means making sure he gets his 2 naps. First nap is 2 hours after wake up.  JW gets up at 6 am, so his first nap is between 8am and 8:30am.  It should last about 1 or 1 1/2 hours. If he wakes up at 10am then 2nd nap should be 3 hours later at 1pm, and it should be 1 1/2 or 2 hours long.  Putting bedtime at 7pm, 4 hours later, lasting 11 hours for a wake up at 6am the next day.  Confusing? I know.  Just try to remember 2, 3, 4.  Thats how many hours should be in between resting periods. ( Also, here is a sleep chart that shows the amount of sleep and naps by age: http://www.parents.com/baby/sleep/basics/age-by-age-guide/)

In the beginning, do not worry too much about how you put him to sleep for his naps.  You need to do whatever you can to make sure he gets those 2 naps for at least 2 1/2 to 3 hours ( After he is sleep trained at night, training for naps is very easy.)  Once you have him napping, make a nighttime routine.  Make sure it doesn’t last more than 45 minutes, that is just too long and he will get fussy.  Ours is simple; bath, pjs, bottle, book, bed, almost all B’s!  You can make it whatever you would like, this just works well for us.  Also, you want to be careful not to introduce any blue light (TV, phone or computer) an hour before bedtime.  Blue light really messes with your sleep patterns, this is also true for adults, so try to limit yourself if you are having a hard time falling asleep.

We used the shuffle method for JWs sleep training.  For the first 3 days, once JW was in the crib, I sat in a chair next to the crib so he knew I was near and it was safe to sleep.  He cried a lot!  But I could not give in and pick him up. I was able to stroke his hair or rub his back and say calming words but that is it.  Once he was asleep I could slip out.  If he awoke during the night I went back in to sit on the chair and do the same thing over again.  It was very hard and exhausting, but you need to keep at it, because eventually it will work.  After the 3 days, I moved the chair closer to the door, gave less comforting and less words.  After 3 days, another move and no comforting, even less words.  After 3 days, another move, no comforting, no words.  It took 3 weeks, but JW finally got it!

We had to start from the beginning a few times and soon found out that my presence was actually keeping him up.  So, instead of letting him see me towards the end, I would stand outside and giving calming words. That did the trick!  What kept me going? First, was the encouragement and confidence I received each morning from my phone call with Alison.  I kept a log each night and in the morning Alison would call to review the night.  We discussed what happened and would make a plan for that nights training.  It was a huge motivating factor to have that constant support! Second thing that kept me going, knowing that I was giving my son a skill that he would have for the rest of his life, being able to fall asleep and stay asleep.  Getting a goods night rest is important for babies, children and adults and I knew I was providing him with a gift for the rest of his life.

Napping came easy after that.  I put him in his crib and left the room, I would have to give calming words a few times but it only lasted a week.  Now he is sleeping in his crib for naps and at night.  Here is a sample schedule that we follow now with a sleep trained baby:

6:00am JW wakes up

6:30am Bottle and Breakfast

8:30am Morning Nap

10:00am Wake up and Bottle

11:30am Lunch

1:00pm Afternoon Nap

2:30pm Wake up and Bottle

3:30pm Snack

5:30pm Dinner

6:30pm Bath, PJs, Bottle and Book

7:00pm Bedtime

Thats it.  Our day in a nutshell.  There are very few gaps in there for activities but we make it work.

There is so much more that went into sleep training, this is just a general overview.  If you have any questions I would love to answer them for you, also, you can reach out to a sleep consultant in your area.  Hope this was helpful!

Blessings and Love,

Colleen

Surviving Sleep Your Babies First Year, pt 1

sleepy 2

Dear Pregnant Self,

It has taken me almost an entire year to write this post. Why? Because sleep has been an issue for us since the nugget was born.  It took us over 9 months to get help, thank goodness we did because now JW sleeps for 11 hours straight at night!  He also takes 2 naps totaling 3 hours during the day. Oh, did I mention this is all in his OWN CRIB and without us having to rock or sooth him. He has learned how to put himself to sleep and then back to sleep if he wakes up before 6 am.  How did we do it? Well, first, let’s start at the beginning.

sleepy 3

When I was pregnant I was determined my baby was going to sleep in his own crib all night long and I was never going to allow co-sleeping.  I thought, ” I could never sleep with the baby in the bed what if one of us rolled over on him or he suffocated?” However, after a few weeks of constant night feedings and a little love that would only sleep if you held him, I woke up one night to find that I had fallen asleep with the baby in our bed.  And what did I find? Nothing. He was fine, I was fine and my husband fine.  It was the longest all of us had slept since JWs birth.  Thats when I thought, “this co-sleeping thing might not be so bad.

sleepy 4

For 9 months we co-slept and it worked for us. Big J stays at the office some nights, so JW would keep me company.  Even when daddy was home it was ok, we all just snuggled together.  Then at around 9 months, JW became very mobile and it got to the point, where him sleeping in our bed, was getting dangerous.  More then once I woke up to find him about to dive, head first, off of our very tall bed onto the hardwood floor.  Also, he was getting BIG and we were running out of room in the bed for all three of us.  So it was time for my little boy to sleep in his own crib, in his own room.

sleep 1

At first, we tried to take on this task on our own. Epic Fail.  JW ended up back in our bed after only a few days.  We needed help.  I remembered a Moms Club Meeting where a Sleep Coach came to speak with us.  I got her information and a few phone calls later, we had an appointment and a promise of payment in full from our insurance company. YAY!

sleepy 5

Our first meeting last 2 and a half hours and I left feeling empowered and determined.  I knew I had to do this for my son.  I discovered he wasn’t getting nearly enough sleep, for his age he needed 3 hours of naps, twice a day and 11 hours of sleep a night. Which he was not.  Most parents think if you keep the kid up, tire them out and over stimulate them they will be sooooo tired they will sleep all night.  But thats actually opposite of what you need to do. The best way to get your kid to sleep at night is to make sure they have enough sleep during the day and calming activities in the evening.  If your child isn’t getting enough sleep they run the risk of getting sick, not growing or developing properly and being cranky and not enjoying their day.

With the help of our Sleepytime Coach, we were able to get JW to sleep through the night in 3 weeks and in his crib for naps a week later.  It has really changed our life in so many ways.  JW is happier and has so much more energy and mom has more time to get things done!

Sleepytime Coach

Next post, I will outline what we did to get these results, but I need to stress that every child is different and highly recommend you see a sleep coach if this is an issue for you.  I do not think I could have lasted all those weeks without the daily support and encouragement of our Sleep Coach. Until next time…

Blessings and Love,

Colleen

Mom-made Activities for Your One Year Old

_DSC0646truck 1

Dear Pregnant Self,

Your little one year old pre-toddler is on the move and ready for a challenge!  Each child is different in their interests and activity development, so we will just use JW as an example. Right now he is totally into cars, trucks and anything with wheels.  As well as, balls and objects your can roll and chase.  Finding something he really enjoys, we decided to “roll with it” and now he has various vehicles and balls in a variety of sizes and colors.

ball 1 car 1


As much as its awesome thats JW has a favorite activity, he still needs to develop in other ways.  His motor skills and problem solving skills both need stimulating.  It can also be a good time to learn shapes, colors and sorting.   There are numerous products out there to spend money on but you really do not need to. Here are two very easy and inexpensive activities mom can make for your nugget.

First is the color sort bins.  I went to the Dollar Tree and found 3 medium sized plastic bins in bold basic colors.  They only had blue, green and red.  I wish they had yellow, that would have rounded out the activity but oh well.  Next, I went home and during afternoon nap time I collected as many green, red and blue objects and toys as I could find and put them in their corresponding bins.  I immediately noticed I had almost nothing green, so I added a small plastic bowl and cup to fill the bin.  This is a nice visual on what the different colors are and we discuss what color is what, while we play.  Also, now we only take out one color at a time.  This is great for keeping things tidy!

color bins


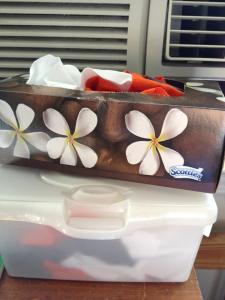
Next is an activity I defiantly stole from Pinterest, the fabric scrap pull.  I took a few of my husbands older, but clean, t-shirts that were headed out to donate and cut them into fabric squares, not too big that they wont fit thru the containers opening and not too small that JW could choke on them. Then I just stuffed them into an old baby wipe container and the rest in an empty tissue box (with the plastic removed).  JW LOVES using his two fingers to pluck the scraps out of the containers! Once they are all removed stuff them back in and try again. Its that easy!

rag pull 1 rag pull 2


Hope these activities inspire many more mom-made fun for your little one!

Blessings and Love,

Colleen


If I were to go back and do it all over again…

mommy kissesbig smiles1

Dear Pregnant Self,

No regrets- that is a given.  However, with the knowledge and experience I have gained over the past year, if I could go back would I change a hand full of the methods and products I used? YES!  In some cases, would I do exactly the same thing? YES!

Let’s start from the very very beginning before JWs birthday, when he was still safely tucked away in my belly.  I did a great job of packing my hospital bag way in advance at about 28 weeks.  Only, I decided to store it in my hall closet and my water broke 25 minutes away from my house.  It would have been much better if I would have left the bag in my car, that way it was with me everywhere I went.  Once the hospital bag was safety delivered to the hospital, I soon found out that I packed the wrong type of clothes.  Following the many online hospital bag packing lists, I bought a ton of yoga pants and loose t-shirts.  After the C-section, the last thing I wanted were pants pressing on my abdomen, so I would suggest light weight jersey cotton maternity maxi dresses.

Next, we used a travel system for the first few months.  If I had to go back I would ditch the travel system and go with the convertible car seat and the City Mini stroller.  The City Mini has the best features of every type of stroller.  Stroller envy whenever I see one of those babies at the park or mall!

City Mini Stroller

City Mini Stroller

Since we are on the topic of getting around with the little one it would be a good time to talk about babywearing.  For JW, we used the Moby Wrap then graduated to the Stokke MyCarrier.  We still love both, BUT, if I had to do it all over again I would go with one carrier from the beginning, the Ergo Carrier.  It has an optional newborn insert and comes in a variety of colors and even a eco-friendly green organic version.

Ergo Baby Carrier

Ergo Baby Carrier

Get a good camera!   It took me a year of iPhone pics to finally breakdown and buy a DSLR camera and take a course to learn how to use it.  I do not want to look back on my little boys childhood and have it be blurry and fuzzy.  I purchased a Nikon D3100 with a few different lenses.  Also, I signed up for classes at photoclasses.com.  Only a few days in and already the quality of pictures are amazing!

Nikon D3100

Nikon D3100

Regrets… NEVER! However, with some improvements would this last year been a little easier… YES!

Hope this helps 🙂

Blessings and Love,

Colleen